How to - Creative Wall Painting
Have you ever been scrolling through Pinterest or Instagram and stopped on some of the most beautiful graphically painted walls and thought to yourself...How do they do it? Naturally most of us will paint a wall without even thinking about doing anything more than just that. But the secret is...you can be as creative as you like, transforming something quite traditional into something spectacular. Colour is a great way to break up a space and create zones for different tasks. You can also use different shapes to help highlight architectural details or statement pieces in your home.
To start off our series of “how to” blogs we are giving you all the best tips and tricks for creative wall painting from some of our all time favourite interior design influencers.

Richard O'Gorman @househomo
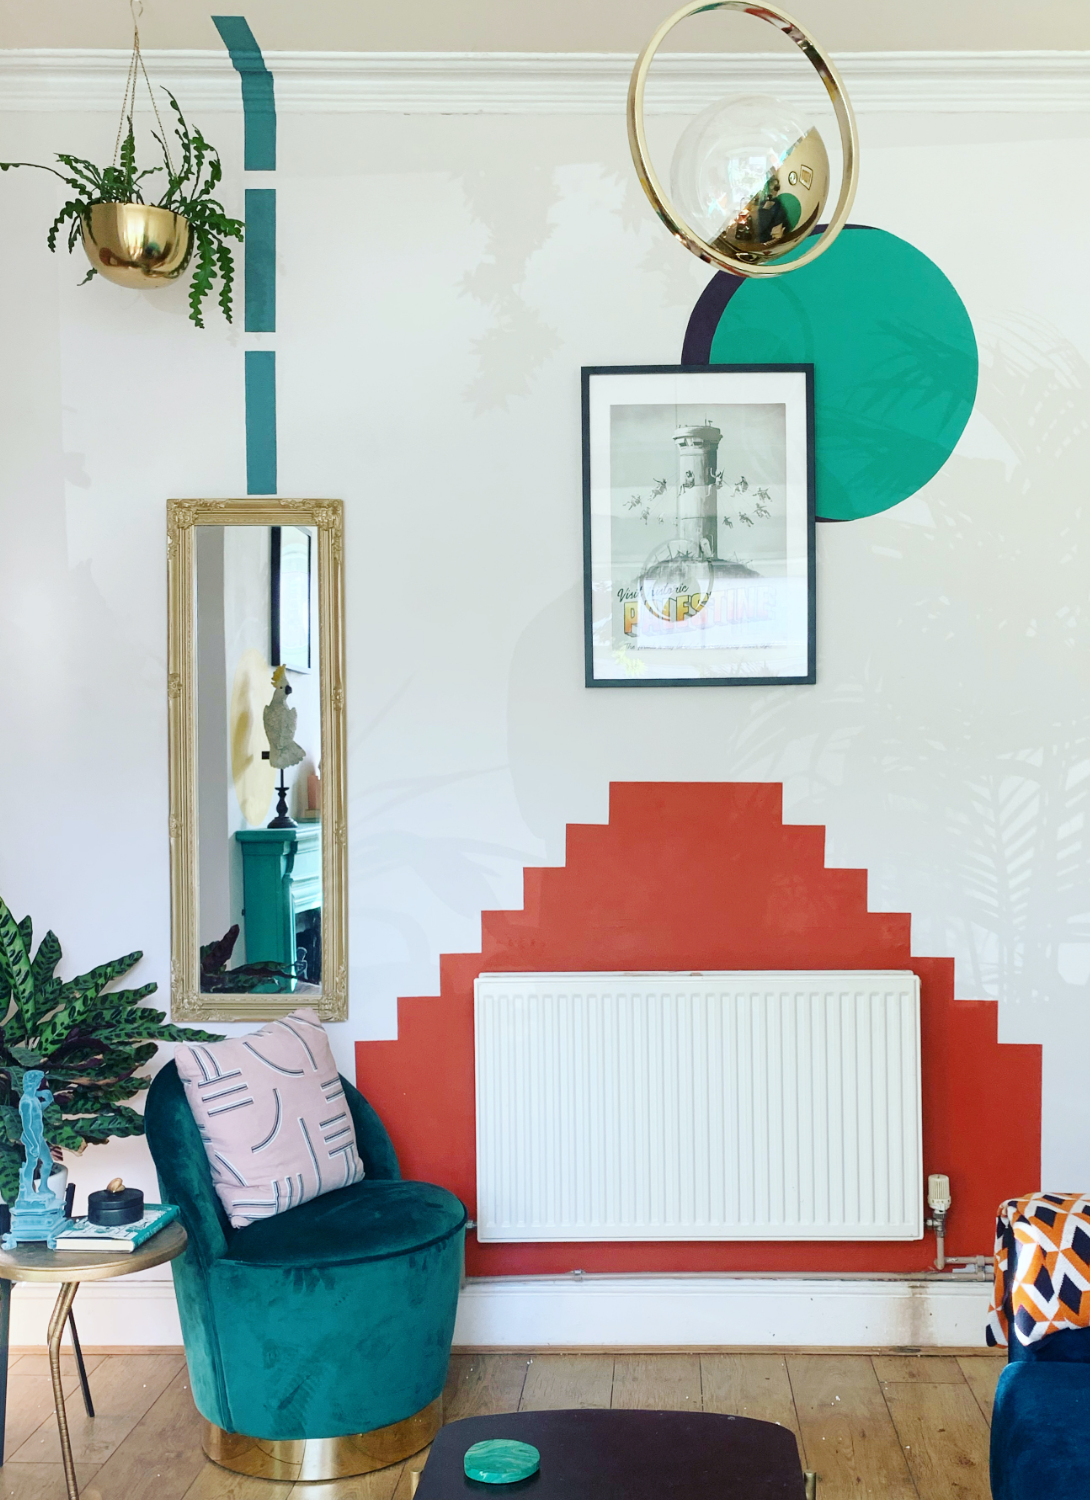
Hey, I'm Rich, inventor of the househomo method. I'm big into bold colour pairings, eclectic styling and of course, shapes! When I moved into my house in February, it was a sea of magnolia & taupe and it's so much more fun and bright and joyful with bolder colours, I cannot stress enough how happy the colour makes me! I recently painted my bathroom ceiling yellow, and it makes the upstairs landing feel like it's sunny outside, even when it's not - and I'd love to say I planned that but it was just an unexpected benefit. When planning the shapes or colour blocking, it's important to get a feel for the room. To understand how much light it's getting and where the sight lines are etc. Try and walk into the room and imagine you're walking into it for the first time;
1) What do you see first?
2) Where do you look?
3) What features are already in the room that you can work with?
In my hallway, for example, there are two doorways and an archway, so I decided to mirror the shape of the archway above the doors. I hung a disco ball, and then drew around the shadow of the disco ball and painted that in a highlight colour. When you're drawing shapes, go back to school. Remember in Maths class you would use a pencil and string/protractor/compass and you never imagined in your life you would use them again? Well, I used em alllll! When drawing archway shapes, I begin by drawing the straight lines, using a spirit level to make sure they're 100% vertical and then finish by drawing the curve.

1) Measure the middle point between the two lines
2) Hold your string at that point and line the pencil up to the lines
3) Press the string tight against the wall and pull the pencil up and around between the two lines (you can use a pin but that leaves a hole, just depends how brave you wanna be!)
4) Then once you're happy with your shape, use a TEENY TINY paintbrush to follow the outline and then work up to bigger brushes once the outline is one.
5) Don't be afraid to mess up either - it's better to paint bolder & faster to get a smoother line, and then you can go over any mistakes after!
When I'm drawing circles - I genuinely use a saucepan lid or anything circular I can find around the house. My favourite thing is painting shapes around light switches; they're features and they're not going anywhere, so celebrate them!
My main sources of inspiration are @Sitio_ and @Mrbuckleyinteriors . They document this futuristic architecture and design that focuses on clean shapes and bright colour pairings. I'm trying to emulate that futurism with paint (and loads of plants) and of course, houseof's lights also focus on these clean shapes so it's a no brainer that they belong in househomo. If you're unsure or apprehensive to take the bright & bold plunge, my advice is to pick your favourite colour and paint your most used room in that shade. There's no way you won't enjoy it because it's your favourite colour and it's a smart way to dip your toe in this colourful pool. I promise you won't look back!

Jo and Chris @two.men.and.semi
A simple way to brighten up a space using leftover paint sample pots.
We always end up with a bunch of left-over paint sample pots from our projects that we are never sure what to do with. On a day off work I wanted to do something creative so decided to use the leftover samples to liven up an otherwise blank boring white wall...
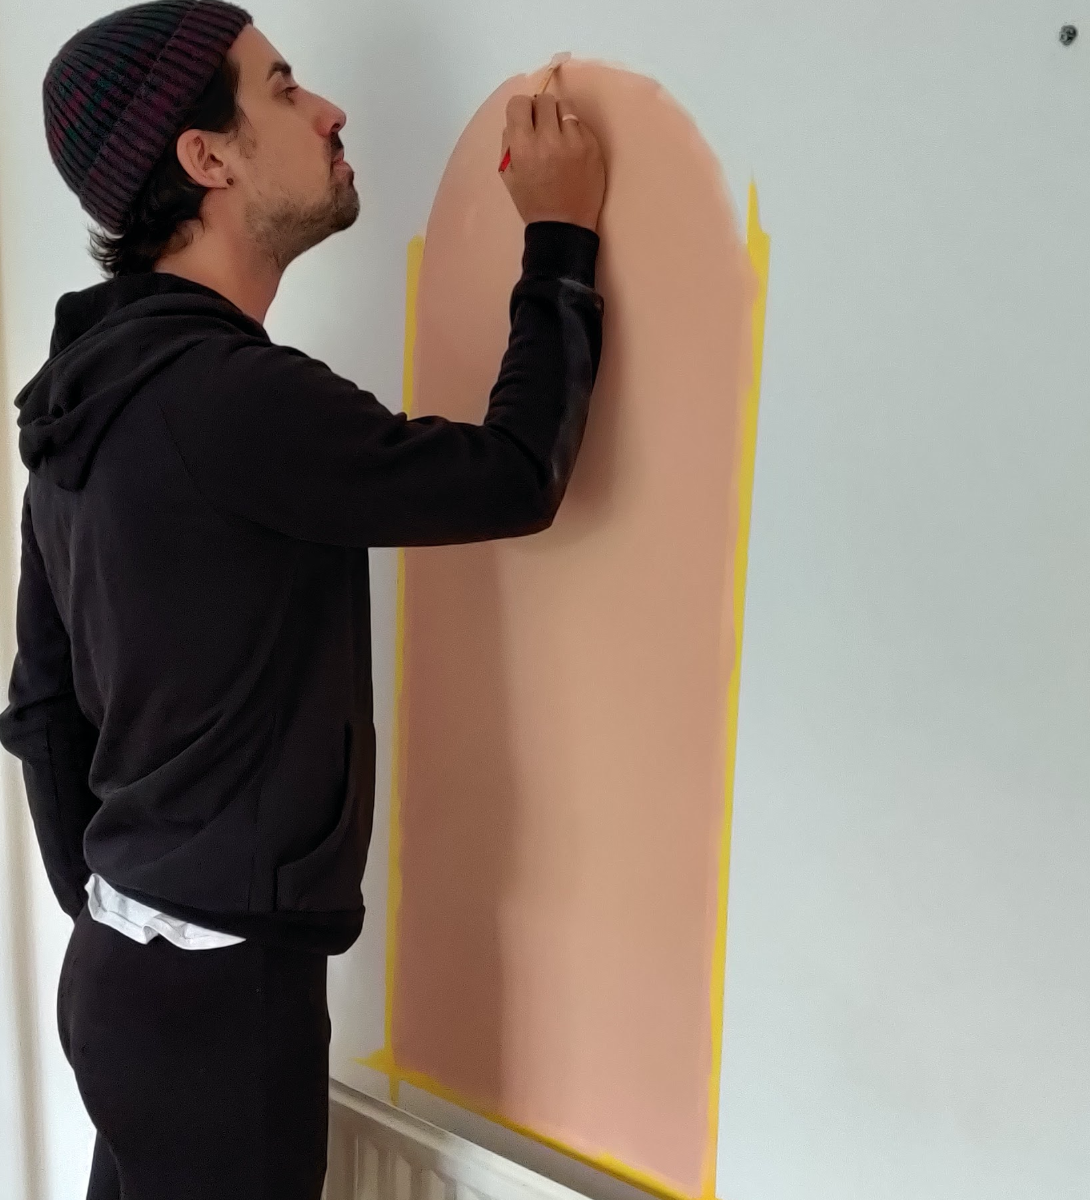
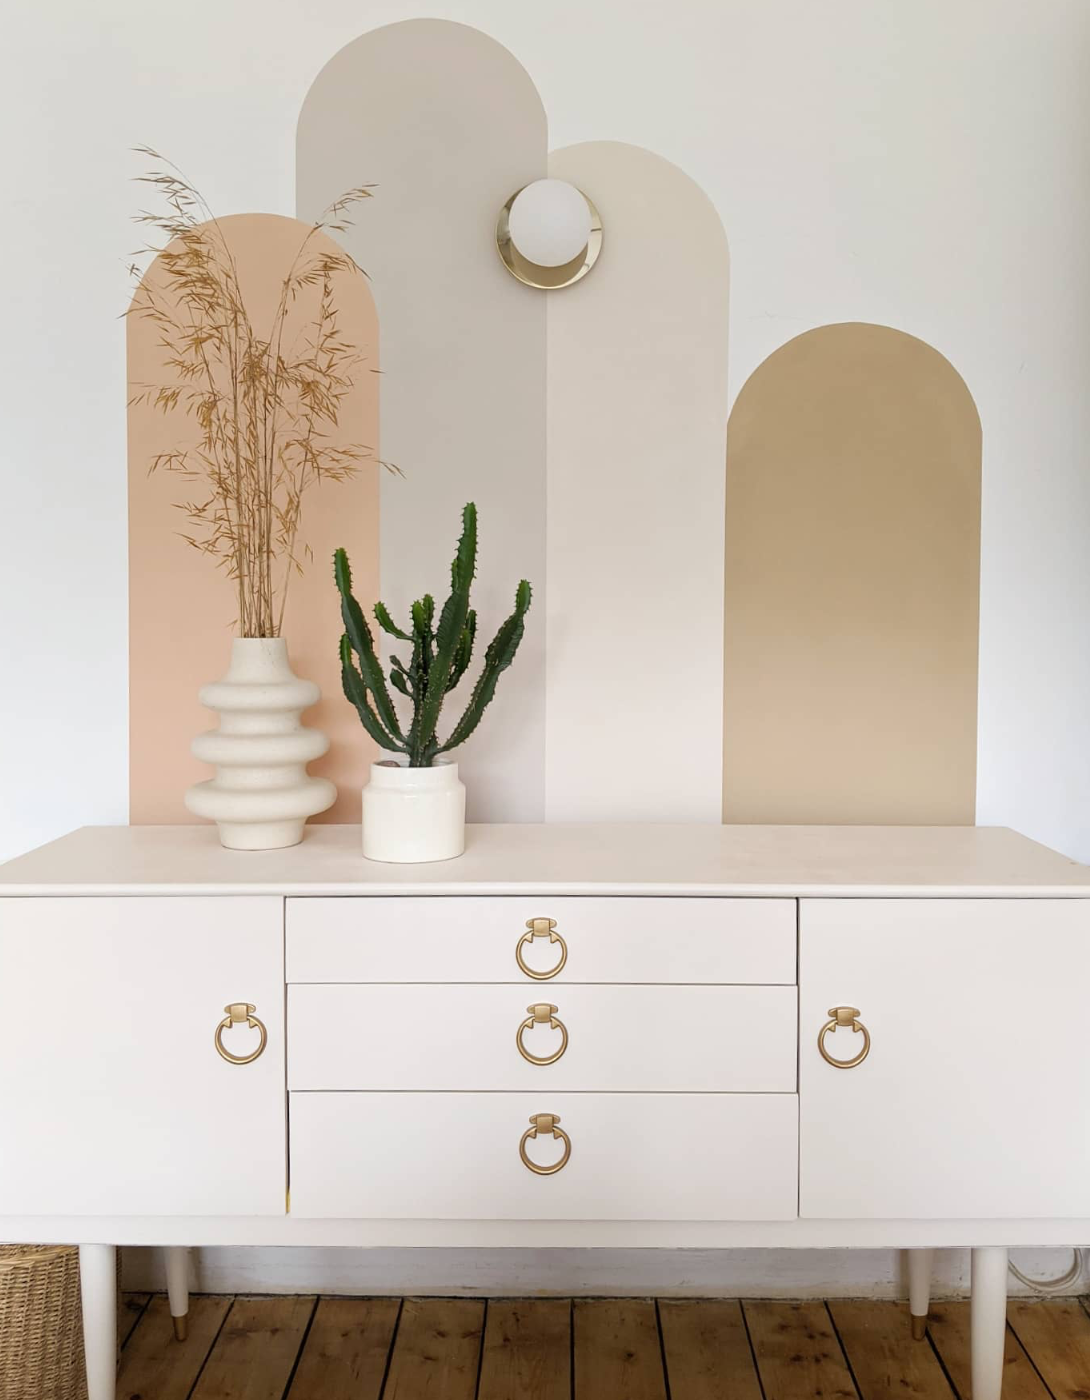
I decided to draw some arches with some complementary colours inspired by one of our favourite art pieces in the house. First off, I drew the shapes I wanted to create on a piece of paper to finalise the design. Once I was happy, I drew the shapes lightly on the wall using a pencil. For the straight sections, I used a spirit level to get straight vertical parallel lines. For the rounded top sections, I used a round lampshade to trace around. If you don’t have anything suitable to trace around put a tack nail into the wall and knot a string around it. At the other end of the string tie your pencil at your desired length and use that to create the circular shape.
Next, add a good quality masking tape for the straight sections. Each arch needs to be painted in phases. So I painted arches 1 and 3 first, removed the masking tape and once dry added masking tape for arches 2 and 4. A top tip is to remove the masking tape while your final coat is still wet, this way you get a nice crisp line without any peeling. Paint the main body of the arches using a roller and get as close to the top of the arch line with the roller as you can.
For the top of the arch, I used a flat artist’s brush and a lot of patience! This takes a lot of precision so give yourself a lot of time. Do not put too much paint on your brush and slowly trace along the line. Make sure to step back from the wall every once in a while to get a better perspective as you work. You may need to do a second coat on the edges. To finish off we added the houseof.com Brass Opal Disk Wall Light in the centre of the mural.